Hashtags Part 3: How to implement hashtags
We have reached the final part of my three part blog series on all things hashtags #️⃣
In blog one we started off the series with what’s new with hashtags and why you should still be using hashtags.
Then in blog two we dove into how to find which hashtags to use.
And this week in blog three we’re talking about how to implement all those wonderful hashtags you found during your hashtag research.
But first, if you missed the last two blogs go ahead and read them first before reading this one … I’ll wait! 😜
Ok, now let’s get into it…
After compiling your hashtags, you should have something that looks like this with all of your hashtags ready to go:
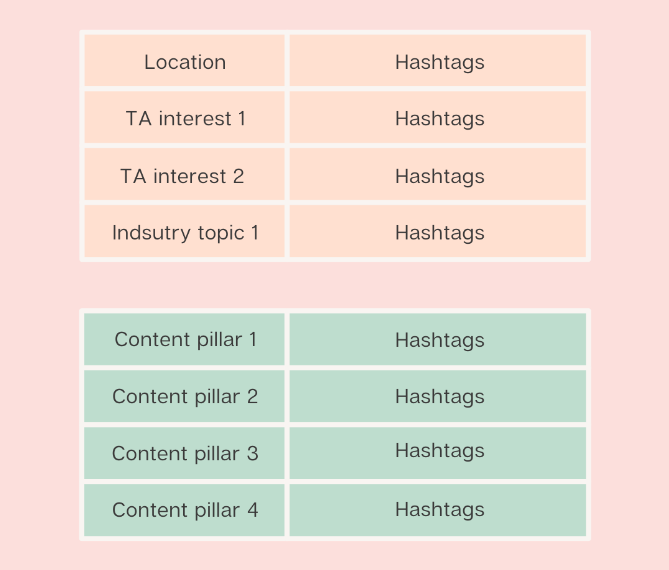
Scheduling platforms such as Planoly or Later allow you to save your hashtags into these categories. This means that when you’re writing up your posts you can automatically select the hashtags button and add the relevant category in - how easy is that!
If you don’t use a scheduling platform you can have this saved in your notes on your phone and copy and paste to add them in.
How often should you switch them up?
I like to switch my hashtags up every 3-6 months. I will do a complete audit of all the hashtags in each category:
👉🏼 Which ones are still relevant to my business?
👉🏼 Are any of these hashtags banned now?
👉🏼 Which hashtags aren’t performing well.
Then I will add in new categories that are updated to align with my current strategy and any business updates.
When you continually use the same hashtags, Instagram picks up on this and is less likely to push your content. This is why I switch up my hashtags so often. To help with this, you can also combine two categories together.
Hopefully this has made creating and using hashtags so much easier for you and you’re now using hashtags that you can reap the benefit from!
-Ela xx


